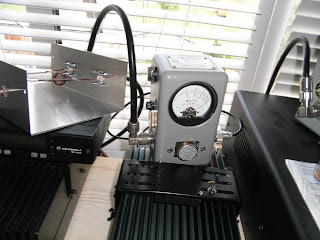
My 6M Junkbox Tuner
Having got it home (And smuggled it past the XYL) I installed it and tested it into a load. 
Having spent so much on the amp I was concerned about running it into a bad VSWR. My HB9CV would easily take the power but was presenting the amp with about 1.5:1 which is quite a few watts of reflected power when running 200 watts. What I needed was a tuner to protect my investment.
I had seen a couple of designs on the net so I decided to have a go and build my own. The design used two variable capacitors and an inductor in a pi network. But the designs I saw tended to use plastic enclosures to avoid interaction with the coil.
As I was going to run 200 watts I decided a metal enclosure would be safer and more stable. To avoid interaction the sides of the box would need to be 3.5 times the diameter of the coil from the coil.
So I needed a fairly large enclosure for this project. The most suitable product I found is provided by Maplin Electronics. Their enclosure AB15 is 202mm in length, 152mm deep and 76mm tall.
http://www.maplin.co.uk/Module.aspx?ModuleNo=1728&criteria=enclosure&doy=29m7#Faq
The last two figures were the most important. The coil would only be 3x the diameter of the coil from the top and bottom of the box but I felt this would be okay.
Aluminum has to be the easiest metal to work with and 20 minutes had all the holes drilled and punched ready for all the components.
The tuner didn’t have to match a very broad range so the coil is 3 turns of 2.5mm copper wire at ¾”diameter
I had a couple of variable capacitors in my junk box which were about 50pf. I made sure the capacitors were properly secured to the chassis and all the joints soldered. You can see that I suspended the coil from the wires between the coaxial sockets and the capacitors so it was in the middle of the box (Away from the sides). This also makes it easy to remove and adjust or replace the coil.
Initial testing on low power went well; the tuner easily matched the antenna. I screwed the box closed, re-tuned and everything worked fine running 100 watts. I increased the power while carefully watching the reflected power. The unit needed a small re-tune but everything still seemed fine.
On the air I went back to an EA calling on SSB from southern Spain. The band was closing and he was just about readable but gave me a 59 in return so the amp and tuner were doing their thing.
This tuner handles plenty of power and although it has a limited range I could tune my G5RV jr with it!


2 Comments:
I have a lot of surplus comercial junk, and I was gonna do the same for 2 meters as well. any Ideas on this the goal is to use up stuff that is well made but a little out of band. My eye sight is poor and I can not see how the Variable caps are mounted or wired. thanks Darrell KB5ZXM Magnolia Texas.
my email is kb5zxm at yahoo dot com or arrl dot net. thanks
Hi Darrell,
Click on the photos and they will expand to full size..
For 145 Mhz I would use a similar box but about one turn inductor. The caps can be about 25pf but if you have larger just test it and remove a few vanes to get the tuning where you need it..
Post a Comment
<< Home